
The CH32V003 is an ultra‑low‑cost RISC‑V microcontroller commonly used in embedded projects. Unlike conventional MCUs that require a dedicated programmer for every flash cycle, CH32V003 supports a flexible programming flow — first through a low‑level utility and then through a higher‑speed serial (UART) bootloader.
This guide will walk through the full process in detail: setting up the flashing utilities, preparing the IAP (In‑Application Programming) bootloader, and finally uploading your application firmware via UART.
Pre‑Requirements
- A Windows or Linux PC (Windows is more common for CH32 tooling).
- A proper programmer — WCH‑LinkE is recommended, as it supports the one‑wire programming interface used by CH32V003.
- USB‑serial connection (for later steps) — a UART interface and cables.
- The WCH tools:
- WCH‑LinkUtility (latest version 1.6+)
- WCHMcuIAP_WinAPP bootloader sender
- A development board or breakout with accessible PD5 (TX) and PD6 (RX) pins for UART programming.
Step 1 — Download & Configure WCH‑Link Utility
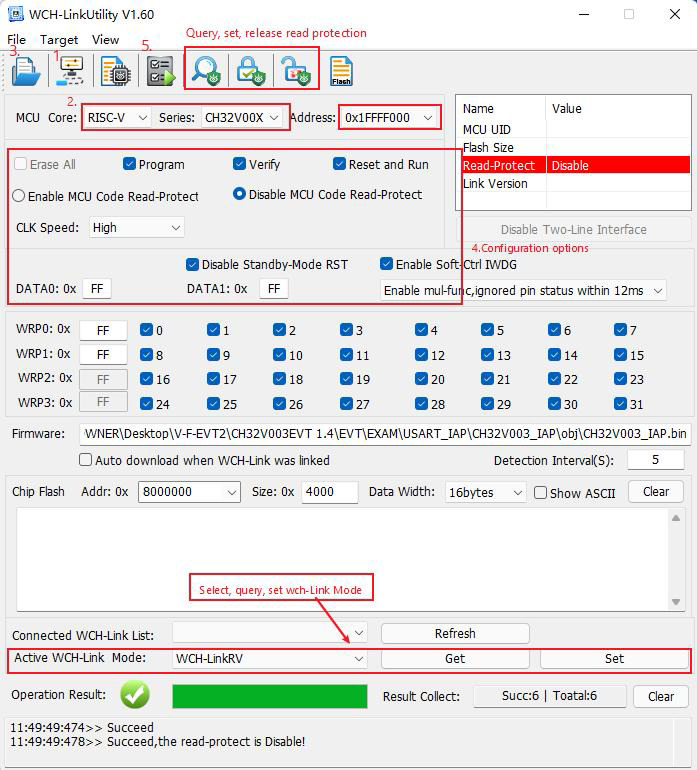
Begin by acquiring the WCH‑LinkUtility tool — you’ll use this to write the initial bootloader into the MCU’s reserved flash area. Make sure your version is 1.6 or newer so that the full memory range required is supported.
Some IDEs and toolsets like MounRiver Studio bundle this utility internally and can export it directly if you prefer an integrated workflow.
Tip: Always verify the tool version so that you can access advanced features like writing the IAP boot sector.
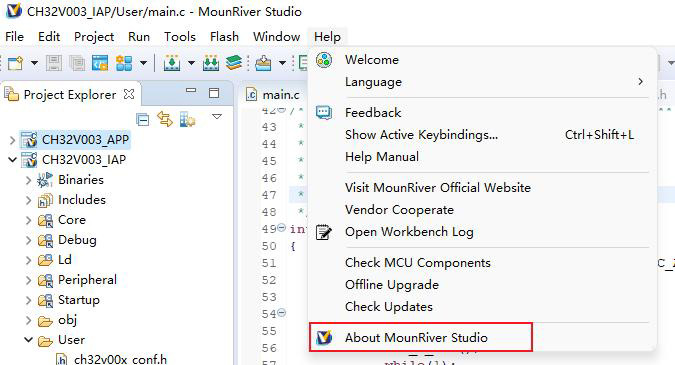

For WCH-Link Utility tool, check Tools section in the MounRiver Studio as shown in the image below:

Step 2 — Write the Serial Bootloader (IAP)
Once WCH‑LinkUtility is ready, the next task is to flash a small In‑Application Programming (IAP) loader:
- Open the IAP binary from the vendor’s CH32V003 firmware package.
- Use the WCH‑LinkUtility to write this binary to address 0x1FFFF000 in the MCU’s flash.
- This initial programming uses the one‑wire interface supported by WCH‑LinkE and allows UART updates.
Important: This bootloader step only needs to be done once. After it’s flashed, future code uploads can happen over UART without returning to this utility.

Step 3 — Load Your Application Over UART
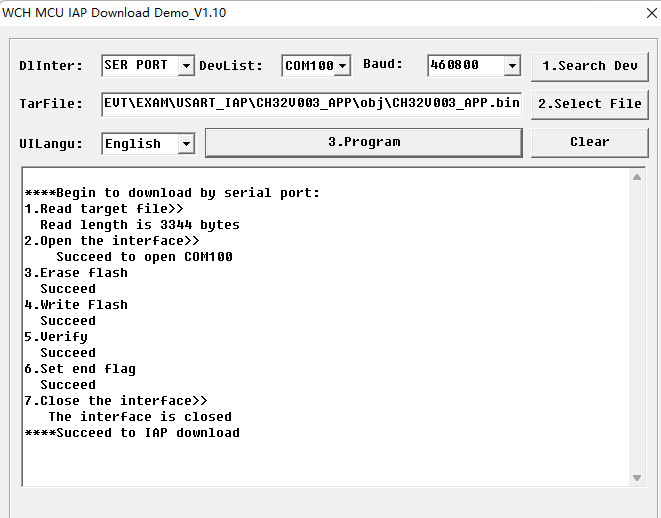
After the IAP bootloader is installed, you can send your compiled firmware through the serial port:
- Connect your PC’s UART adapter to the MCU pins — typically PD5 (TX) and PD6 (RX). Ensure proper logic levels (usually 3.3V).
- Use WCHMcuIAP_WinAPP — this program sends your .bin file to the MCU using UART.
- Make sure PC0 is floating during the programming phase, as it can affect bootloader entry.
- The default UART baud rate in the IAP bootloader is typically 460800, though it may be reconfigured within the IAP code itself.
When the upload completes, tie PC0 low and reset or power cycle the MCU — your application should now start running.

Programming Notes & Best Practices
- CH32V003 uses a one‑wire programming pin (combined SWIO) for low‑level flash access, which is distinct from UART TX/RX pins used by the bootloader.
- Ensure your MCU is powered and grounded properly before attempting any flash operation.
- If UART uploads fail, double‑check your serial adapter wiring and baud settings.
- If you ever need to recover from a bad flash, re‑running the bootloader utility with WCH‑LinkUtility can help unbrick the chip.
- For development ease, consider keeping a USB‑to‑serial adapter readily accessible to test retries quickly.
Buy Links
- https://www.bdtronics.com/wch-link-emulator-programmer-debugger-for-for-risc-v-arm-cmsis-dap-type-c.html
- https://www.bdtronics.com/ch32v003-development-board-48mhz-32-bit-risc-v-microcontroller.html
Resources
- Tutorial: https://www.bdtronics.com/blog/how-to-program-ch32v003-with-wch%E2%80%91link-programmer
- MounRiver Studio access website: http://mounriver.com/
- WCH-LinkUtility access website:https://www.wch.cn/downloads/WCH-LinkUtility_ZIP.html
- WCHISPTool access website: https://www.wch.cn/downloads/WCHISPTool_Setup_exe.html
- WCH-Link information website: https://www.wch.cn/products/WCH-Link.html
With these steps, you can program the CH32V003 either through a dedicated low‑level flash utility or conveniently via UART once the bootloader is in place. This workflow balances flexibility and speed for rapid embedded development.
Explore further — GPIO, UART, SPI and ADC interfaces — once you’ve successfully uploaded your first firmware!